


Oyster mushrooms are admired by chefs for their delicious flavor and beloved by mushroom growers for their vigorous growth. Indeed, their adaptability and voracious nature make them an excellent choice for novice growers and a classic staple for those with experience.
In this guide, we’ll tell you everything you need to know about growing Oyster Mushrooms. If you’re just getting started with growing, we recommend you check out our introductory series on mushroom cultivation and the in-depth stepping-stone articles mentioned there.
What are Oyster Mushrooms?

Oyster Mushrooms are delicious and versatile gourmet mushrooms. Even those who claim to not like mushrooms are rendered fans when they try them for the first time. They’re not like the slimy button mushrooms most people are used to, but meatier and firmer in texture.
There are many different types of Oyster Mushrooms, all of which belong to the genus Pleurotus. These include Pink Oysters, Yellow Oysters, Pearl Oysters, Italian Oysters, and many, many more. We’ll go into the difference between these later.
Health Benefits Of Oyster Mushrooms
While Oyster mushrooms aren’t as highly regarded as other so-called “functional mushrooms,” they do offer many unique health benefits due to the compounds they contain. For example, Oyster Mushrooms are rich in ergothioneine, a type of antioxidant unique to fungi that has been shown to improve healthy aging and cognitive function. Ergothienine is distinctive, considering that despite being absent in most food sources, our bodies have receptors and intracellular mechanisms adapted explicitly for this compound. They are also rich in Vitamin D, protein, fiber, and low in fat.
What do Oyster Mushrooms Look Like?

Oyster Mushrooms can significantly vary in size, shape, and color depending on the variety and growing conditions. They are called Oyster Mushrooms due to their semi-circular cap, whose shape is often likened to a shell or that of a kidney bean. Most varieties have white gills that partially run down the top of the stem, a key identification feature when looking for them in the wild.
Types Of Oyster Mushroom

There are dozens of different varieties of cultivated Oyster Mushrooms. Even within the same variety, distinct cultivars may behave slightly differently under cultivation.
| Common Oyster Mushroom Varieties | ||
| Below, you’ll find some of the most common Oyster mushroom varieties. Keep in mind that most of these varieties have at least a handful of variants whose growth preferences can vary. The temperatures mentioned are a generalization of ideal growth temperatures, but individual species have a much wider tolerance range. Check the specifications of your specific variant with the source of your culture. | ||
| White “Pearl” Oyster (Pleurotus ostreatus) | Incubation Temp: 70-75°F (21-24°C) | Fruiting Temp: 60-70°F (15-21°C) |
|
Description: One of the most common and a staple for many growers due to their quick growth and tolerance to unfavorable conditions. They tend to be a little more fragile than other varieties, especially when very mature. Cultivation Nuances: One of the easiest to grow and has fast colonization times, sometimes under 2 weeks. It can tolerate a wide range of growing conditions and is a prolific fruiter. It’s a great option for outdoor cultivation. |
||
| Italian Oyster (Pleurotus pulmonarius) | Incubation Temp: 70-75°F (21-24°C) | Fruiting Temp: 60-70°F (15-21°C) |
|
Description: A lot like P. ostreatus but typically much paler and with a preference for warmer temperatures. It is one of the most cultivated oyster mushroom varieties. Cultivation Nuances: Tends to prefer and be more tolerant of warmer temperatures than P. ostreatus. This makes it an excellent species for summer months. |
||
| Blue Oyster (Pleurotus ostreatus var. columbinus) | Incubation Temp: 70-75°F (21-24°C) | Fruiting Temp: 60-70°F (15-21°C) |
|
Description: This oyster is grey in color with a slight bluish hue which gives it its name. The caps get darker than the Grey oyster, especially with cold temperatures, and it tends to have a relatively dense flesh. Cultivation Nuances: Many Blue Oyster varieties thrive in cold climates and are excellent for outdoor late fall/winter/early spring cultivation. They can handle frost and some even require a good cold-shock to fruit prolifically. |
||
| Golden Oyster (Pleurotus citrinopileatus) | Incubation Temp: 75-90°F (24-32°C) | Fruiting Temp: 70-80°F (21-27°C) |
|
Description: These are impressive bright yellow capped oyster mushrooms that thrive in warm temperatures. They have a unique, enjoyable taste compared to other oysters. Consider that this variety is now known to be invasive, and its cultivation should be avoided to prevent further spread. Cultivation Nuances: Grows quickly and thrives with warm temperatures. It’s best to avoid harvesting them when overly mature, especially if you intend to transport them, as they become very fragile. |
||
| Pink Oyster (Pleurotus djamor) | Incubation Temp: 75-90°F (24-32°C) | Fruiting Temp: 70-80°F (21-27°C) |
|
Description: These are the gorgeous bright pink oyster mushrooms. They are native to tropical climates and prefer warm temperatures. The texture tends to be more fragile than other species. Cultivation Nuances: This species really loves warm temperatures. Cold temperatures below 65F can begin to hinder its growth. They are relatively fragile especially when very mature. |
||
| King Oyster (Pleurotus eryngii) | Incubation Temp: 68-71°F (20-22°C) | Fruiting Temp: 59-64°F (15-18°C) |
|
Description: This is one of the most distinctive Oyster mushrooms, easily recognized by its grey cap and large-dense stems. They are extremely meaty and have good flavor. Some people like to cut the stems to make pseudo-scallops. This is one of the most preferred varieties in Asia. Cultivation Nuances: Unlike other oysters, this variety does not do great on straw and prefers hardwood sawdust. It does excellent in master’s mix or Redwood Mushroom Supply’s ready-to-go fast fruiting mix. It does well with cold temperatures and has an amazing shelf life. Many growers prefer to top-fruit this species as it results in very lovely dense clusters. In this context, it can benefit from a casing layer. |
||
| Grey Oyster (Pleurotus ostreatus) | Incubation Temp: 70-75°F (21-24°C) | Fruiting Temp: 50-75°F (10-24°C) |
|
Description: Another hardy and staple variety for many growers. It forms nice clusters and tends to have denser flesh when compared to the white oysters. Cultivation Nuances: Highly tolerant and can be grown like the white Oyster, although colonization can be slower. |
||
Cultivating Oyster Mushrooms
Oyster mushrooms are one of the easiest mushrooms to cultivate. They’re notably hardy and tolerant of diverse environmental conditions. This said, their vigorous growth does not make up for bad cultivation practices or shortcuts. As mentioned earlier, new growers should check out our introductory series on mushroom cultivation and the in-depth stepping-stone articles mentioned there.
Also, it’s worth mentioning that Oyster Mushrooms can also be cultivated on logs for outdoor cultivation. This is an excellent low-tek method that aligns with the season and can last many years. For more on this method, see our article on “How to Grow Mushrooms On Logs.”
| Oyster Mushroom Cultivation “Cheat Sheet” | |
| Scientific Name: | Pleurotus ostreatus, Pleurotus eryngii, Pleurotus djamor, Pleurotus pulmonarius, Pleurotus citrinopileatus... |
| Common Names: | Common Oyster, White Oyster, Grey Oyster, Blue Oyster, Pink Oyster, King Oyster, Italian Oyster |
| Substrate Preference: | Extremely adaptable. Oysters can be grown on straw, agricultural waste, coffee grounds, or hardwood sawdust. |
| Incubation Time | |
| Logs | 8–12 months |
| Sawdust Blocks | 2–4 weeks |
| Time to Mature From Primordia | 4–10 days |
| Growth Conditions | |
| Incubation Temperature: | Highly adaptable and variable. Most enjoy temperatures between 70–75°F (21–24°C), but P. djamor and P. citrinopileatus enjoy warmer temperatures between 75–85°F (24–29°C). |
| Fruiting Temperature: | Also highly adaptable and variable. Most enjoy temperatures between 55–70°F (13–21°C), while P. djamor and P. citrinopileatus enjoy 70–80°F (21–27°C). |
| Humidity: | About 95–100% for primordia formation and 85–90% for fruiting body development. Oysters are generally tolerant of fluctuations, given that the humidity does not drop too-low for extended periods of time. |
| Ventilation/CO2: | Good air circulation is crucial during fruiting. |
| Light Requirements: | Indirect sunlight or some fluorescent lighting. Low-lighting results in paler mushrooms, while high light results in darker pigmentation. |
| Harvest | |
| Harvest Stage: | The best time to harvest is while the margin of the cap is still folded downwards. Mature specimens extend their caps upwards, and while still perfectly edible, they have inferior shelf-life and texture. |
| Biological Efficiency: | 35–70% |
| Yield: | 1.5 to 3.5 lbs per 5lbs block |
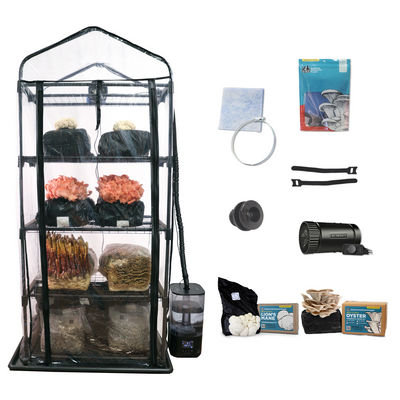
Materials
You don’t need a professional lab to grow Oyster mushrooms, but having the right materials is pertinent. Here's a basic list to get you started:
-
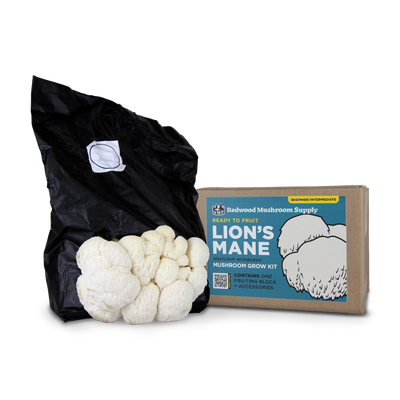
Mushroom Spawn
This is the “seed” utilized to “plant” your mushroom. It is usually made of grains or sawdust that have been entirely colonized by a pure culture of fungal mycelium. This is utilized to introduce your culture into a new growth medium. Make sure to source quality spawn, as this is fundamental to success. You can also make your own spawn at home easily, by acquiring pre-sterilized grain bags and inoculating them with an Oyster Mushroom liquid culture. If you have any doubts, check out our article on spawn. -
Substrate
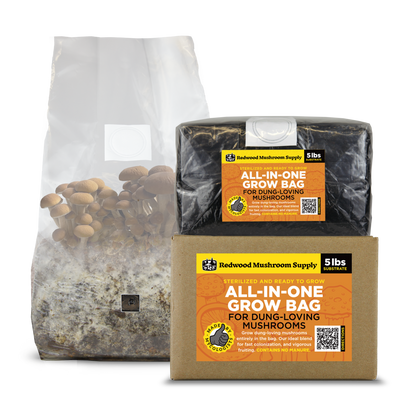
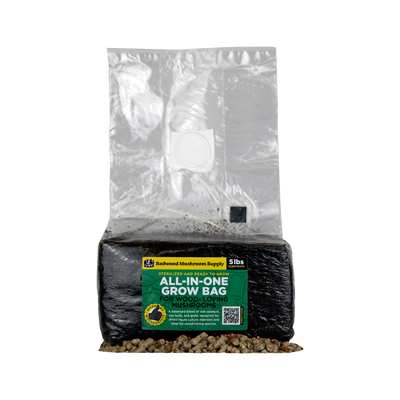
We’ll discuss substrate more in-depth later, but for now think of it as the bulk growth medium for your fungus. It is what your spawn (above) is spread onto. Oysters are flexible and can grow on straw, sawdust, agricultural waste, or even coffee grounds.An easy option is to order some of our Fast Fruiting Mix, which comes pre-sterilized in a grow bag and guarantees large harvests. Check out our introduction to substrates article for more info. -
Container or Grow Bag
Your substrate and spawn need to be housed in something breathable but protected. Most growers use mushroom grow bags with filter patches, but buckets, bins, or DIY containers can also work. See our article on grow bags for more info on these. -
Pasteurization/Sterilization Equipment
Depending on your substrate, you’ll need to either pasteurize or sterilize it. For pasteurization, a large pot or drum may be enough. Also cold-water alkaline pasteurization works great for Oysters. For sterilization, you’ll need a pressure cooker or autoclave. Check out our article on Pasteurization/Sterilization here. -
Gloves and 70% Isopropyl Alcohol
Maintaining cleanliness during inoculation is key. Use alcohol to disinfect your hands, tools, and surfaces. You could alternatively use disinfectant wipes. -
Incubation Space
A dark or dimly lit space with steady temperatures (ideally around 70–75°F / 21–24°C for most oysters) is ideal for incubation. -
Fruiting Chamber or Fruiting Environment
Whether it's a humidity tent, greenhouse, grow room, or a modified tub—your fruiting area needs to provide fresh air exchange, high humidity (85–95%), and indirect light. It is achievable without this if your ambient climate is humid.
1. Making Your Spawn (optional)
While you can buy spawn, it’s much more fun to start from scratch and make your own. You can easily do this with a liquid culture syringe and a bag of presterilized grains. Simply wash and disinfect your hands and work space, as well as all the equipment and packaging. Attach the needle to your syringe and inject 3- 5 mL of liquid culture into the grains through the injection port. Keep at 72 - 77°F (22–25 °C), or lower, for 4 weeks or until the grains are completely covered in mycelium. You may need to do a “shake and break’ at around week 2 to spread the mycelium properly.
If a high yield isn’t your biggest concern, it should be noted that you can also inoculate the liquid culture directly into a sterilized substrate.
2. Choosing Your Substrate

One of the unique things about Oyster mushrooms is their adaptability to many different substrates. They can grow on straw, coffee grounds, agricultural waste, and almost any carbon-based material you can think of. This is unlike most other gourmet and functional mushrooms, which tend to be cultivated on sawdust substrates. If you have any doubts about the substrates, you can check out our in-depth article on substrates.
Generally speaking the two most common substrates for Oyster Mushrooms are hardwood sawdust or straw.
-
Hardwood Sawdust: Hardwood sawdust is the go-to substrate for many growers. One of the easiest sources is hardwood fuel pellets. If you source from a wood shop or mill, just make sure it is from hardwoods like Oak, Maple, Walnut, or Apple, and not soft-woods like Pine, Spruce, Hemlock, or other conifers. While shavings can work, finer material is better.
-
Straw: Oysters are one of the few mushrooms that grow well on straw. It should be chopped in four to five-inch pieces to make it more appetizing to the mycelium. I’ve done this with a machete, but you can also run over your straw with a lawn mower, or place it in a large bin or garbage can, and go at it with a weed whacker. Oat, Wheat, Rice, and most other types of straw work, just make sure it is fresh, dry, and has been well stored. Avoid straws that have not been properly stored and are already decomposing.
-
Supplemented Hardwood Sawdust: Supplementation allows for higher yields at the cost of a higher contamination risk. Since it is so rich in nutrients, it is simply sensitive to other microorganisms taking over. To avoid contamination with supplemented sawdust, you must sterilize the substrate (this means utilizing a pressure cooker or autoclave) and follow strict sterile techniques (inoculating under a laminar flow hood or still air box). The most common recipe for supplementation is a 50-50 sawdust and soybean hull mixture known as “Master's Mix.”
-
Utilizing A Pre-Sterilized Substrate Bag (Recommended for Beginners)
An excellent option for beginners who want guaranteed results is to get a pre-sterilized substrate bag. We offer a “Fast Fruiting Mix” which works excellently for Pioppino. These are filled with a perfectly hydrated custom mix of sawdust and soy hull and then sterilized, removing any doubt or hassle from cultivation.
3. Grow Bags or Cultivation Vessel

A grow bag or vessel is fundamental to the cultivation process. It houses the colonizing substrate and protects it from microorganisms like Trichoderma and pests like fungus gnats. The most commonly used is specialty mushroom grow bags. These are sterile bags that hold the substrate and also have a filter patch for air exchange. See our article on grow bags for more info on these and check out our selection here.
Another good option is a bucket with 6-10 evenly spaced 1/4” holes. These holes should be covered with micropore tape or polyfill to allow for some breathability. Make sure the bucket is clean and properly disinfected with alcohol. You can use almost any other container, just make sure it can seal properly but has some breathability.
4. Pasteurization/Sterilization of Your Substrate

We go into all the details of Pasteurization and Sterilization in this article. Please see this for an in-depth explanation on the process.
While pasteurization and sterilization are often utilized interchangeably, they entail different processes.
-
Sterilization is the complete elimination of microorganisms from a material, usually through high pressure and temperatures exceeding 390°F (200°C). This means utilizing a pressure cooker or autoclave. Sterilization is necessary for supplemented substrates. For sterilization, the grow bags are filled before being sterilized and then inoculated under a flow hood or via liquid culture.
-
Pasteurization is less intensive than sterilization and entails an almost complete elimination of microorganisms, usually through temperatures at or below 212°F (100°C). Pasteurization is often better, especially as it reduces contamination risk when dealing with unsupplemented substrates. Oyster mushrooms also do well in substrates treated with alkaline pasteurization methods. For Oysters, you can easily get away with pasteurizing your substrate in bulk before filling it in your vessel.
5. Inoculating Your Substrate

Depending on your preferred method and the substrate you’re working with there are one of two ways to inoculate. See our inoculation article for an in-depth discussion on this.
-
Sterile substrates need to be inoculated in a clean space and under a flow hood. It is also possible under a Still-Air-Box (article for this is pending.) This is usually done by carefully adding your spawn into the pre-sterilized substrates and mixing it in the grow bag.
-
Pasteurized substrates can be inoculated outdoors in a manner of methods. You can simply layer your pasteurized substrates with alternating layers of spawn, or mix it all together before filling your bag/vessel.
6. Incubation Period
Incubation is the time between inoculation and before fruiting. It is the “growth period” when the mycelium is allowed to colonize your substrate and assimilate its nutrients. Incubation is best done in a dark environment with a steady temperature of about 70-75°F (21-24°C) for most Oyster varieties. This said, they can usually tolerate temperatures between 35–80°F (1.5–26.5°C) depending on the variety. Blue Oysters are great for colder temperatures while Pink and Yellow Oysters love warmer temperatures between 75–80°F (23.9–26.7°C). The typical incubation period is anywhere from 2-4 weeks, but it can be longer if conditions aren’t ideal.
You can find our in-depth incubation guide here.
7. Fruiting Your Mushrooms

Fruiting is the final stage before harvest, when the mushroom fruiting bodies go from small pins called “primordia” and grow into the fully mature mushrooms we eat. During fruiting, proper temperatures and humidity, and fresh air exchange are fundamental. For primordia formation, you usually want relative humidity levels >95%, and then during fruiting, you can drop it down from 80-90%. Thankfully, most oysters are pretty tolerant of drops in humidity, although it is not ideal.
To achieve these conditions year-round, mushroom growers must utilize specialized fruiting spaces fitted with environmental controls. Large growers may have fully equipped fruiting rooms or large tents. Hobby growers can utilize small grow tents, or if they’re only fruiting a block a time, they can use a fruiting chamber. If you are looking to up your cultivation game, check out our plug-and-play grow tents that come with everything you need to fruit your mushrooms year-round.
The one nuance to fruiting Oyster mushrooms is that they really need a lot of fresh air exchange. If you’re fruiting in a closed environment, a fruiting chamber, or a sealed room, you really need to pump up the air exchange because Oysters produce a lot of CO2. In high concentrations,CO2 can lead to lanky and poorly developed mushrooms.
We recommend you check out our in-depth guide on fruiting for more information about this.
8. Harvesting

The maturity of an Oyster Mushroom can usually be told by the shape of the cap. Young mushrooms typically have the cap margins curved down towards the edges in a convex manner. As they mature, the cap margin begins unfurling upwards, exposing the gills, and eventually turning concave. The best time to harvest is right before the caps unfurl upwards. This ensures that they fully grow, while retaining the best qualities (texture, shelf life, transportability, etc.)
You can simply harvest with a twist in pluck method to remove the stem while taking the least amount of substrate with you. You can cut the mushrooms if you wish, although this can sometimes attract pests like fungus gnats and prevent an additional flush. You can get additional flushes by allowing the brick to rest for 1-2 weeks and then rehydrating it and placing it in fruiting conditions.
Common Problems in Oyster Mushroom Cultivation
-
Long, thin stems (leggy mushrooms): Insufficient fresh air exchange aka high CO₂ levels.
-
Pins form but stop growing: Low humidity or incorrect fruiting temperature.
-
Dry or cracked caps: Occurs when there is insufficient humidity during fruiting, or if there are high quantities of fluctuation. .
-
Mold (green, black, pink, etc.) on substrate: Contamination due to improper pasteurization/sterilization or poor hygiene during/after inoculation. Sometimes Oysters can overcome small patches of contamination, but if large portions of your substrate are contaminated there may be no saving it.
-
No mycelial growth after inoculation: Spawn could be weak/dead, but what is most often is excessive humidity in the substrate. This is especially true if you notice stalled growth towards the bottom of a growbag that appears saturated. In this case, you can try draining the substrate. This can also happen from poor pasteurization.
-
Mushrooms are soft, slimy, or discolored: Over-maturity, excessive moisture, or poor air circulation. This can sometimes be caused by bacterial blotch.
-
Fungus Gnats: Fungus gnats lay larvae in the fruiting bodies or substrates colonized by mycelium. As their names suggest, they specialize in eating fungus. If they get inside your bags/buckets they are a huge vector for contamination. These only appear when your bag/vessel is not properly sealed.
Conclusion
Growing Oyster mushrooms is relatively easy and straightforward. It’s a great option for any beginner grower just looking to experiment with mushroom cultivation, or for those who are just trying to pump out a large amount of production in rustic conditions with a tight budget. They’re also pretty delicious and chalk-full of health benefits! If you have any doubts about the cultivation of Oyster Mushrooms make sure to check out the other articles in our blog, you might find your answer there. If not, you can feel free to reach out.
Cheers and happy growing :)


