


Pioppino mushrooms are an exciting and under-appreciated variety of culinary mushrooms. While they’re not as popular as other species like the familiar Oysters, Lion's Mane, and Maitake, they are undoubtedly delicious and an exciting ingredient for creative chefs and home cooks. They are also fairly easy to cultivate, utilizing methods similar to other hardwood-loving species, with minor nuances.
What are Pioppino Mushrooms?

Pioppino Mushrooms are scientifically known as Cyclocybe aegerita and also go by the common name Poplar Field Cap. As this name suggests, they are closely associated with Poplars, as the branches, trunks, and stumps of Poplars are their most common natural habitat. In form, they are a pretty typical mushroom shape with a brown cap and white stem, usually growing in clusters. They mostly occur in the eastern USA, Europe, and Asia, although they’re found in most places where poplars grow. They (or a very similar species) grow with willow in Asia.
Pioppino Mushrooms have been highly valued culinary mushrooms for a long time, and were even mentioned in Pliny the Elder’s Naturalis Historia, written almost 2000 years ago. While it’s rumored he mentions primitive cultivation techniques for Pioppino in his text, this doesn’t seem to be the case, according to my review of the text (feel free to reach it out if you find otherwise.). This said, techniques involving burying poplar logs for cultivation date back to at least 950 AD, where they are mentioned in the old Byzantine text Geoponica.
In terms of cultivation, Pioppino mushrooms are easy to grow. Some growers even suggest they are easier than Oysters due to their high tolerance of CO2 during fruiting. They are typically grown on hardwood sawdust, but some growers have succeeded on other substrates. One important nuance is that they prefer cooler temperatures and are not very heat tolerant.
From a culinary standpoint, Pioppino mushrooms are exquisite. There’s a reason they’ve been widely appreciated for thousands of years. They're nutty with a nice crisp texture, and adaptable to any savory recipe. They can grow pretty significant in size, but smaller specimens are typically the most delicious.
| Pioppino Cultivation “Cheat Sheet” | |
|---|---|
| Scientific Name: | The current accepted name is Cyclocybe aegerita. Other former names include Agrocybe aegerita, Pholiota aegerita, and Agrocybe cylindrica. |
| Common Names: | Pioppino, Poplar Field Caps, Poplar Mushrooms, and Velvet Pioppino. |
| Substrate: | Thrives best on hardwood sawdust from broadleaved trees. |
| Incubation Time | |
| Logs | Presumably, it can be grown on logs, but this is not common and will be experimental. It is worthwhile to utilize softer hardwoods like Poplar, Alder, Cottonwood, etc. Likely takes 12 to 18 months. |
| Sawdust Blocks | 2 - 4 weeks |
| Time to Mature From Primordia | 4 - 7 days |
| Growth Conditions | |
| Incubation Temperature: | Prefers 72 - 77°F (22–25 °C) but can tolerate 64 - 82°F (18 - 28 °C). |
| Fruiting Temperature: | 59 - 68 °F (15 - 20 °C) |
| Humidity: | About 95-100% for primordia formation and 80-90% for fruiting body development. |
| CO2 Tolerance & FAE Requirements | Relatively tolerant of high CO2 levels compared to Oysters, but still requires some FAE. Excessive FAE will result in leggy mushrooms and potentially paler caps. |
| Light Requirements: | Indirect sunlight or some fluorescent lighting. Low lighting may cause a paler cap color. |
| Harvest | |
| Harvest Stage: | Harvest them small before the cap opens up completely for the best texture and taste. |
| Biological Efficiency: | 60 - 100%, or even up to 150% with proper supplementation. |
| Yield: | 3 - 5 lbs per 5 lbs block |
Cultivating Pioppino Mushrooms
Growing pioppino is similar to growing other wood-loving mushrooms. In summary, pasteurized/sterilized substrates are mixed with mushroom spawn (which contains a pure culture of the chosen fungus) and allowed to grow during incubation. This usually happens in a vessel like a mushroom grow bag, although with Pioppino, some folks do it in tubs similar to manure loving species. After incubation, which is usually 2-4 weeks, the mushrooms are placed in a humid environment to allow for the production of the mushroom fruiting bodies. These can be harvested generally within a week of pinning. Afterwards, it is possible to achieve 2nd and 3rd flushes, although they are inferior.
Nuances Of Pioppino Cultivation
Before going in-depth into the cultivation process, here are some nuances to consider that make them unique compared to other cultivated species.
-
Cold Loving: Pioppino mushrooms prefer cooler temperatures and are less heat-tolerant than other species. This makes them an excellent choice during cooler times of the year, but not in contexts with warm temperatures.
-
Slow To Pin: Pioppino can be slow to pin, even once placed in fruiting conditions. Once pins appear, though, the growth can be fast, and can mature in as little as 3 days.
-
CO2 Tolerant: Compared to Oyster Mushrooms, which demand high levels of fresh air exchange (FAE) during fruiting, Pioppino mushrooms are relatively tolerant of low FAE and high CO2 levels.
Materials
You don’t need a professional lab to grow Pioppino mushrooms, but having the right materials is pertinent. Here's a basic list to get you started:
-
Mushroom Spawn
This is the “seed” utilized to “plant” your mushroom. It is usually made of grains or sawdust entirely colonized by a pure culture of fungal mycelium. This is utilized to introduce your culture into a new growth medium. Make sure to source quality spawn, as this is fundamental to success. You can also make your own spawn at home easily, by acquiring pre-sterilized grain bags and inoculating it with a Pioppino liquid culture. If you have any doubts, check out our article on spawn.
-
Substrate
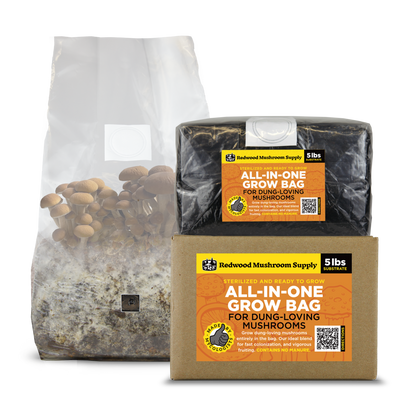
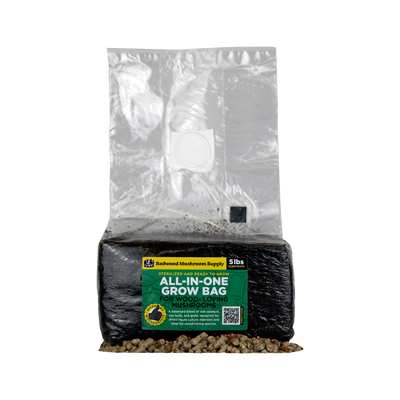
We’ll discuss substrate more in-depth later, but for now, think of it as the bulk growth medium for your fungus. It is what your spawn (above) is spread onto. Pioppino thrives best on hardwood sawdust, but they can grow well on other substrates, such as straw pellets. An easy option is to order some of our finest Fast Fruiting Mix, which comes pre-sterilized and guarantees large harvests. Check out our article on introduction to substrates for more information.
-
Container or Grow Bag
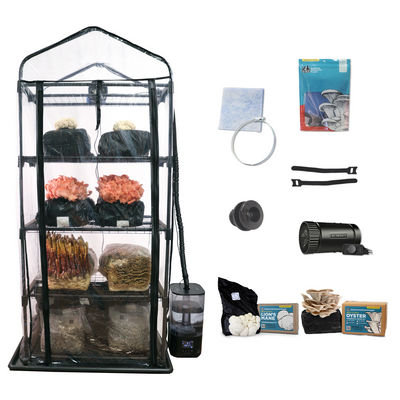
Your substrate and spawn need to be housed in something breathable but protected. Most growers use mushroom grow bags with filter patches, but buckets, bins, or DIY containers can also work. See our article on grow bags for more info on these. You can see our wide selection of high-quality grow bags here.
-
Pasteurization/Sterilization Equipment
Depending on your substrate, you’ll need to either pasteurize or sterilize it. For pasteurization, a large pot or drum may be enough. For sterilization, you’ll need a pressure cooker or autoclave. See our Pasteurization/Sterilization article here.
-
Gloves and 70% Isopropyl Alcohol
Maintaining cleanliness during inoculation is key. Use alcohol to disinfect hands, tools and surfaces. You could alternatively use disinfectant wipes.
-
Incubation Space
A dark or dimly lit space with steady temperatures is ideal for incubation.
-
Fruiting Chamber or Fruiting Environment
Whether it's a humidity tent, greenhouse, grow room, or a modified tub, your fruiting area needs to provide some basic fresh air exchange, high humidity (85–95%), and indirect light. To achieve these conditions year-round, mushroom growers must utilize specialized fruiting spaces fitted with environmental controls. Large growers may have fully equipped fruiting rooms or large tents. Hobby growers can utilize small grow tents, or if they’re only fruiting a block a time, they can use a fruiting chamber. If you are looking to up your cultivation game, check out our plug-and-play grow tents that come with everything you need to fruit your mushrooms year-round.
1. Making Your Spawn

While you can buy spawn, it’s much more fun to start from scratch and make your own. You can easily do this with a liquid culture syringe and a bag of presterilized grains. Simply wash and disinfect your hands and work space, as well as all the equipment and packaging. Attach the needle to your syringe and inject 3- 5 mL of liquid culture into the grains through the injection port. Keep at 72 - 77°F (22–25 °C), or lower, for 4 weeks or until the grains are completely covered in mycelium. You may need to do a “shake and break’ at around week 2 to spread the mycelium properly.
If a high yield isn’t your biggest concern, it should be noted that you can also inoculate the liquid culture directly into a sterilized substrate.
2. Preparing Your Substrate

Pioppino's are a wood-loving mushroom that grows best on hardwood sawdust. Hardwood is synonymous with broad-leaved trees like Oak, Maple, Walnut, or Apple, not conifers like Pine, Spruce, and Hemlock. If you are sourcing sawdust directly, make sure to ask the type of wood they are using. It has been observed that they do exceptionally well with “soft” hardwoods like Alder, Cottonwood, Poplar, Aspen, and others. Like most species, they have been observed to do well with hardwood fuel pellets. Straw pellets also seem to work well.
To prepare your substrate, first hydrate it to about 60%. This is easy if your primary material is already dry. If this isn’t the case, hydrate it to “field capacity.” This essentially means it is hydrated but not soggy or oversaturated. A substrate's field capacity can be squeezed in your palm, and only a single drop of water should be exuded when force is applied.
Supplemented Substrates
Some growers supplement their substrates with nutrient-dense materials like wheat bran or soybean hull to improve yield. While this does improve yields significantly, it can also cause a higher risk of contamination, meaning extra sanitary caution is required To avoid contamination with supplemented sawdust, you must sterilize the substrate (utilizing a pressure cooker or autoclave) and follow strict sterile techniques (inoculating under a laminar flow hood or still air box). The most common recipe for supplementation is a 50-50 sawdust and soybean hull mixture known as “Master's Mix.”
Utilizing A Pre-Sterilized Substrate Bag (Recommended for Beginners)
An excellent option for beginners who want guaranteed results is to get a pre-sterilized substrate bag. We offer a “Fast Fruiting Mix” which works excellently for Pioppino. These are filled with a perfectly hydrated custom mix of sawdust and soy hull and then sterilized, removing any doubt or hassle from cultivation.
3. Pasteurization/Sterilization of Your Substrate

This is the part of the process where you “clean” the substrate of any harmful microorganisms by exposing it to high temperatures. If you get a pre-sterilized substrate bag, you can skip this process!
While pasteurization and sterilization are often utilized interchangeably, they entail different processes.
-
Sterilization is the complete elimination of microorganisms from a material, usually through high pressure and temperatures exceeding 400°F (about 212°C). This means utilizing a pressure cooker or autoclave. Sterilization is necessary for supplemented substrates. For sterilization, the grow bags are filled before being sterilized and then inoculated under a flow hood or via liquid culture.
-
Pasteurization is less intensive than sterilization and entails an almost complete elimination of microorganisms, usually through temperatures at or below 212°F (100°C). Pasteurization is often better, especially as it reduces contamination risk when dealing with unsupplemented substrates. Oyster mushrooms also do well in substrates treated with alkaline pasteurization methods. For Oysters, you can easily get away with pasteurizing your substrate in bulk before filling it into your vessel.
4. Inoculating Your Substrate

Depending on your preferred method and the substrate you’re working with, there are different ways to inoculate. See our inoculation article for an in-depth discussion on this.
-
Sterile substrates need to be inoculated in a clean space and under a flow hood. It is also possible under a Still-Air-Box (article for this is pending). This is usually done by carefully adding your spawn into the pre-sterilized substrates and mixing it in the grow bag. You can also inoculate it directly with a liquid culture syringe, although yields will be inferior than when using spawn.
-
Pasteurized substrates can be inoculated outdoors in a manner of methods. You can simply layer your pasteurized substrates with alternating layers of spawn, or mix it all together before filling your bag/vessel.
5. Incubation Period
Incubation is the time between inoculation and before fruiting. It is the “growth period” when the mycelium is allowed to colonize your substrate and assimilate its nutrients. Incubation is best done in a dark environment with a steady temperature of about 77 °F (22–25 °C), although they can tolerate 64 - 82 °F (18 - 28 °C). Excessively low temperatures will impede the growth of mycelium, while high temperatures can also increase the incidence of contamination. Incubation typically takes 2-4 weeks and is over once the block is fully colonized.
You can find our in-depth incubation guide here.
6. Fruiting Pioppino Mushrooms

Fruiting begins with the development of primordia, known colloquially as pins. These are the tiny baby mushrooms that grow and develop into mature fruiting bodies. They develop naturally after incubation, but high humidity levels, a drop in temperature, and an increase in fresh air exchange stimulate their production. These conditions are fostered by placing your grow bags in a specialized fruiting area and cutting a 2-3” slice into the grow bag. Doing this once incubation is complete will stimulate pinning in the area where the cut is made. Pinning can be relatively slow with Pioppino, taking several days.
Another technique common with Pioppino is to “top fruit” the growbag. This means cutting off the top of the bag 3-4” from the substrate, causing a large flush directly from the top. This technique works excellently and is an excellent option if you already see top-pinning. The downside to top-fruiting is that the substrate becomes more exposed, making it susceptible to drying if the conditions aren’t right.
Occasionally, pins will start growing in the bag if you do not catch them soon enough. If caught soon enough, these can be “released” by making a cut right where these pins form. If not caught in time, these mushrooms will grow leggy and eventually abort. They will not be suitable for harvest. In this case, you’ll want to remove the aborts and attempt a second flush.
Fruiting Conditions
-
For primordia formation, you usually want relative humidity levels >95%, and then during fruiting, you can drop it down to 80-90%.
-
Best fruiting temperatures are between 59 - 68 °F (15 - 20 °C). While they can handle fluctuations outside those ranges, it can affect the quality of the fruiting body.
-
You want to provide some ventilation for fresh air exchange
-
To maintain conditions, most growers fruit their mushrooms in enclosed environments like grow rooms, tents, or greenhouses. You can also utilize a fruiting chamber if you only have 1-2 bags.
-
Learn more about this in our introduction to fruiting article.
7. Harvesting

The timing of harvest is important to ensure good texture, flavor, and shelf life. While this isn’t too important if you are growing your own on a small scale, it is fundamental for commercial growers. I often encourage hobby growers to let their mushrooms mature when they are a species they haven’t cultivated, just so they can get a grasp of the growth cycle.
The best time to harvest Pioppino is right after the veil breaks. The veil is a small tissue located beneath the cap that covers the gills on the young mushroom. Harvesting at this point provides maximum yield with the best culinary qualities. If you harvest a little earlier than this, the mushrooms are still great and have a longer shelf life, but the yield is inferior. Mushrooms harvested after this point are completely edible, but they may not be as choice.
To harvest Pioppino, gently remove the cluster with a simple pluck and twist motion. This should remove very little substrate, which can be cleaned off with a knife from the bottom of the cluster. This is recommended over cutting, as you get a superior harvest and reduce disease risk if you do multiple flushes. Second and third flushes can be achieved by letting the block rest in incubation for 1-2 weeks after you are done harvesting and then reintroducing the block into fruiting conditions.
Common Issues Encountered in Pioppino Cultivation
-
Improper or Slow Pinning: As noted earlier, Pioppino can be challenging to pin if conditions aren’t right. Changing to a high humidity environment, with high FAE, and lower temperatures can help this.
-
Side Pinning: If you leave the grow bag for too long, it can eventually start pinning the sides of the bag. This can cause malformed mushrooms that will subsequently abort. Avoid this by cutting your bag after incubation.
-
Aborted Mushrooms: If conditions get too dry or temperatures get too high, the mushrooms can be aborted before they mature.
-
Cracking of Cap: This can occur when conditions are too dry or if humidity fluctuated below the ideal level.
-
Leggy Mushrooms: While Pioppino is relatively tolerant of CO2 in excess, it can cause legginess. This is when the stems grow long and thin, an inferior trait for Pioppino.
How to Cook Pioppino Mushrooms
Pioppino mushrooms are earthy, nutty, and have a delightful firm texture that gives them a satisfying bite. While they can easily be incorporated into any type of dish, there are specific cooking methods that really show off their unique traits.
For me, who really enjoys eating mushrooms, I like to roast or sauté them whole or even as entire clusters. This can be with just some olive oil, garlic, pepper, and aromatic herbs, or you could go all out with your favorite spices. The point is to keep it whole, so the texture and flavor is really pronounced. Cook this well until the mushrooms start to caramelize and serve with your favorite starch.
If you or your loved ones are not such a fan of mushrooms, you can cut them up really fine, sauté with a bit of butter and garlic, and mix them into almost any dish or use them as a garnish. Another pro tip if you're trying to convince someone to enjoy mushrooms is to cook them in bacon fat. That usually does the trick.
Conclusion
Pioppinos are a relatively obscure mushroom variety that remains to be discovered by many. Depending on your region, it might not be available locally at your farmers' markets or specialty food stores. The good news is, if you want to try it, you can always grow it yourself! Being relatively easy to grow, it is an excellent species for anyone interested in mushroom cultivation.
Happy Growing!


